
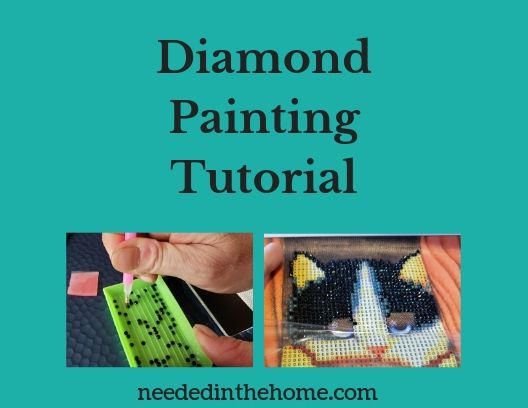
If you have been looking for a diamond painting tutorial in American English, you have found it! Here is where I lay out step by step instructions with photos for you to learn how to make a diamond painting from a kit.
Note: Some links in this post are affiliate links, which means I receive a commission if you make a purchase. Affiliate relationships include, but are not limited to, Bluehost, Amazon Associates, Walmart.com, and Etsy.
What is diamond painting?
While we are all used to painting on canvas with acrylic paints and may even join a fun event like https://www.paintingwithatwist.com, this type of “painting” does not use paint! Diamond painting or Rhinestone Art is a trending art form where tiny (2.5 mm each) colored or clear (aka: crystal, but not made of crystal) multi-faceted shiny, sparkling resin stones (aka: diamonds, rhinestones, beads or drills) are carefully applied to a sticky canvas mat with the flat side down. The two major shapes of rhinestones are round and square, but there are also a variety of special shapes that are used in certain paintings. This art form is done one stone at a time with a special tool called a drill. It is not like a heavy electric drill, it is more like a pen.
The finished result has a 3 dimensional look although it is called 5D. It is called that because technology breaks an image down into a pattern similar to a cross stitch or embroidery pattern. The rhinestones are matched to a DMC color code and you use a Key to determine where each color goes on the canvas. 2.5mm in size.
This is a very popular art form. Many friends will get together on a craft night to spend a few hours working on their diamond kits together. These gatherings are often held at someone’s home and there is often food and beverages. There is always friendly conversation and laughter at these events. Some people call it diamond dots painting as well.
It is also presently a very popular choice for home decorating. Not everyone has 8 to 30 hours to make one, so many completed and framed designs have been purchased from diamond painting artists on Etsy.
Related: How To Start An Etsy Shop
Types of Kits
There are two types of 5D Diamond Painting Kits, one is called a full drill, in which, every bit of the colored part of the canvas will be covered in rhinestones. Such as the wolf picture example below.

The other is called a partial drill, which has some parts of the canvas that are painted and will not be covered with rhinestones. These are best for beginners or for someone who does not have as much time to put into the project. I will be using a partial drill kit for our example today.
What’s Needed:
Helpful Items for this Diamond Painting Tutorial
A light box
I have found a light box to be a necessity if you have older eyes (I am 47 years old) as the light underneath really makes the letters and numbers on the printed canvas show up so much better.

A light box has a cord that can be plugged into the wall outlet so be sure to sit near a plug in or get an extension cord.
.

Magnifying Glass
Even though the light box is very helpful, there are times that I can’t tell the difference between a 4 and 5, especially when the colors behind them are very similar and a magnifying glass helps me to solve the problem.

Slimcase
Not all of my diamond painting canvases fit inside this large case, but when they do – I like to keep the projects I am still working on inside a protected case like this. You may not have 8 kids and 4 pets in your home to worry about bumping into your project so it may not be necessary for you.

The inside is deep enough to store the canvas with the rhinestones on it.

5D Diamond Painting Kit with the tools
Please be sure your kit comes with the drill tool, wax, tray, canvas and resin stones. Double check to be sure you have everything before you begin your project. Some sellers will send whatever is missing for your kit, but if not, you may need to get your money refunded and find another kit to work on.
I recommend buying a kit from someone in the same country you live in for fastest shipping, you don’t want to wait a month or more to receive your kit just to save a few bucks. Especially if you are at all stressed. This is a therapeutic project that helps you to de-stress, which is why it is so addicting. You are so busy focusing on the colors and numbers that you cannot think of your problems for a time, which causes you to relax.
The photo below is what your product should look like when you take it out of the shipping package. They are most often shipped in a bubble wrap mailer. You just unroll your canvas to see the printed picture inside. The Key will be printed on the canvas so there is no need for an extra piece of paper to lose.

Diamond Painting Pens
You can use the plastic pen that is included in the kit. However, some diamond painting artisans prefer to use a decorative diamond painting pen tool. They can be used with round or square diamonds. These are more comfortable to hold in your hand for long periods of time and are made with various materials such as glow in the dark clay, glitter &/or glitter clay, metallic leaf flakes or stickers. It is a way to be creative and unique and not lose your pen at the next craft party!

Diamond organizer storage case
One thing that is very useful to me during the project I am working on is having an organizer. What I do before I begin my project is take an open bag of diamond beads and pour the contents into a circle shaped container. I screw the cap back on. Then I cut the number or letter off the bag and tape it to the top of the little container. This keeps my diamonds organized so I can find the right one quickly.

Here is a close up of what the round container looks like by itself.

Latching Box
I am a very social person and love to get together with friends for a craft night when I can. My friends and I bring whatever craft project we are working on so someone may be knitting, someone is doing embroidery, someone is cutting quilt pieces, four of us are diamond painting, etc.
When it’s time to head out, I have everything for the current project I am working on stored in a latching box, so I can just grab it and my light box and go.

You may want to bring a completed diamond painting to show your friends, here is what that looks like on top of other items in the box.

Diamond Painting Tutorial
1. Open your diamonds one package at a time and carefully pour them into your organizer sections, labeling each section by cutting out the letter or number on the bag and taping it to the cover of each little container.

2. Place your canvas on your light box and turn the light box on.
3. Carefully peel back the clear plastic cover from the top of your piece of wax. Take your drill and push the metal tip into the wax. A little hole will be left there. That means the wax is now inside your drill and you are ready to pick up a diamond. (You will be able to pick up a diamond several times before you notice that they are no longer sticking to your drill tool. When this happens, it is time to get more wax on. Always re-cover the wax with the clear plastic to keep it in the best condition for use.)

4. Now look at the key on your canvas to see what diamond organizer container you need. I personally like to do several of one color at a time. If I am filling in a cat face, I might take out my “A” container and fill all the little “A”s in the cat’s ears, for example. I like that they do not have both a “B” and an “8” as that would be very confusing.

5. Now take the color you want to use and pour some (not all) of those into your sorting tray.

6. Carefully push the tip of your drill onto the shiny, curved side of one diamond. It will stick to the drill tip because of the wax.

7. Peel back the clear plastic cover on your canvas so that the area you will be working on is exposed. Keep everything else covered so your canvas will not lose its stickiness.
8. Line up the diamond with the correct number or letter on the canvas. When it looks properly aligned, push the flat side of the diamond piece onto the canvas so it is stuck there.

9. Continue working in that section with the same color. I like to use up the diamonds in my tray before changing colors so I will re-cover that section with the plastic and find a new area to uncover and use them there if necessary.

10. Always re-cover with plastic when you are not working in a section.

11. Once in a while, during your crafting, push down on the stones with your fingers to be sure they are attached firmly to the canvas.
12. If you are working at a section near the top, uncover with the plastic from the top.

13. If you are working on a section on the bottom, uncover from the bottom with the protective clear plastic.

14. If you are working on the middle, uncover from the bottom up so that your working hand will not lean against and crease the protective plastic.

15. Repeat these steps until all the key coded parts of the canvas are filled in.

16. You can carefully place your completed diamond painting on a roll up mat or puzzle mat like this one…
Then keep the roll in a Roll Keeper until you frame it (as it is nice to frame them all at one time) or until you sell it on Etsy.

17. When you are ready to frame it, realize that diamond paintings are typically made in other countries and do not typically fit in the American standard sizes of frames. You may need to get a larger frame, like an 11 x 14 inch size. You could mat the surroundings or get creative for a background.

18. Just open the frame from the back. Sometimes you may have to carefully lift little tabs on the sides to get it open. Decide if you want the glass on or off. I have eight children, so I want the glass on or those little diamonds may get picked off. Then carefully place your art inside and close it back up.


19. Put a nail in your wall where you want it to hang.
20. Hang your framed art and enjoy.

If you would like printed instructions without the photos or ads, click HERE for more information.
What’s Needed:
Looking for deals? Read posts about Shopping Deals. Subscribe to our Hot Shopping Deals emails so you never miss a deal!
Related
Subscribe so you never miss a post.
Want to remember this? Pin it to your favorite Pinterest Board!
Join the newsletter
Subscribe to receive our latest articles and promotional content by email from NeededInTheHome
Very informative, thank you. I am new to this art and hope to start my first picture soon 🙂